Category Archives: Photography

To Selfie or Not to Selfie?

2007 Nephew Selfie I take a lot of selfies. I do. I admit it. Is it something I’m necessarily proud of? Maybe not. Is it something I’m ashamed of? Definitely not. As a person who is the primary photographer in my life [and that of my family], if I didn’t take selfies there would be almost no photos of me ever.

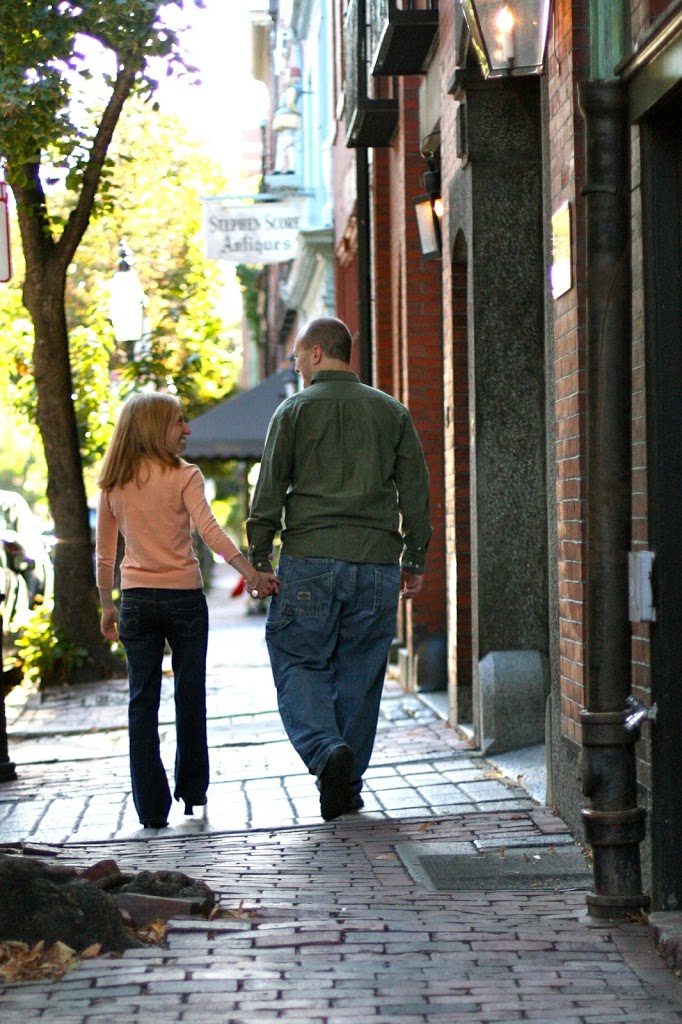
Thus I began taking photos of my nephew and me just after he was born in 2007. We spent a couple hours together every Tuesday. I took a zillion photos of him and since babies grow and change so quickly at that age, at first I was content just to document that. But then I realized I was only capturing part of the story. Tuesdays were about the TWO of us. Not just him alone.  There were no other adults present, so it was selfie or nothing if I wanted to be able to scrapbook the story of these afternoons.

Reading Selfie

Since then selfies have exploded as social media has come into the forefront of our lives. We tweet. We post to Facebook. We Instagram. We share our lives with friends (and strangers), and a big part of that is sharing photos.

Selfie + kids


Let’s face it, seeing a photo to show you what your friend is up to is infinitely more interesting than hearing their description of it…especially when your friend is likely typing said status update on a cell phone and it’s filled with all sorts of interesting typos.

I go back and forth on how I feel about selfies though clearly I’m more in the “it’s cool” camp than not given my social media track record. Maybe this just a purely selfish venture but here are some great reasons you should take selfies:

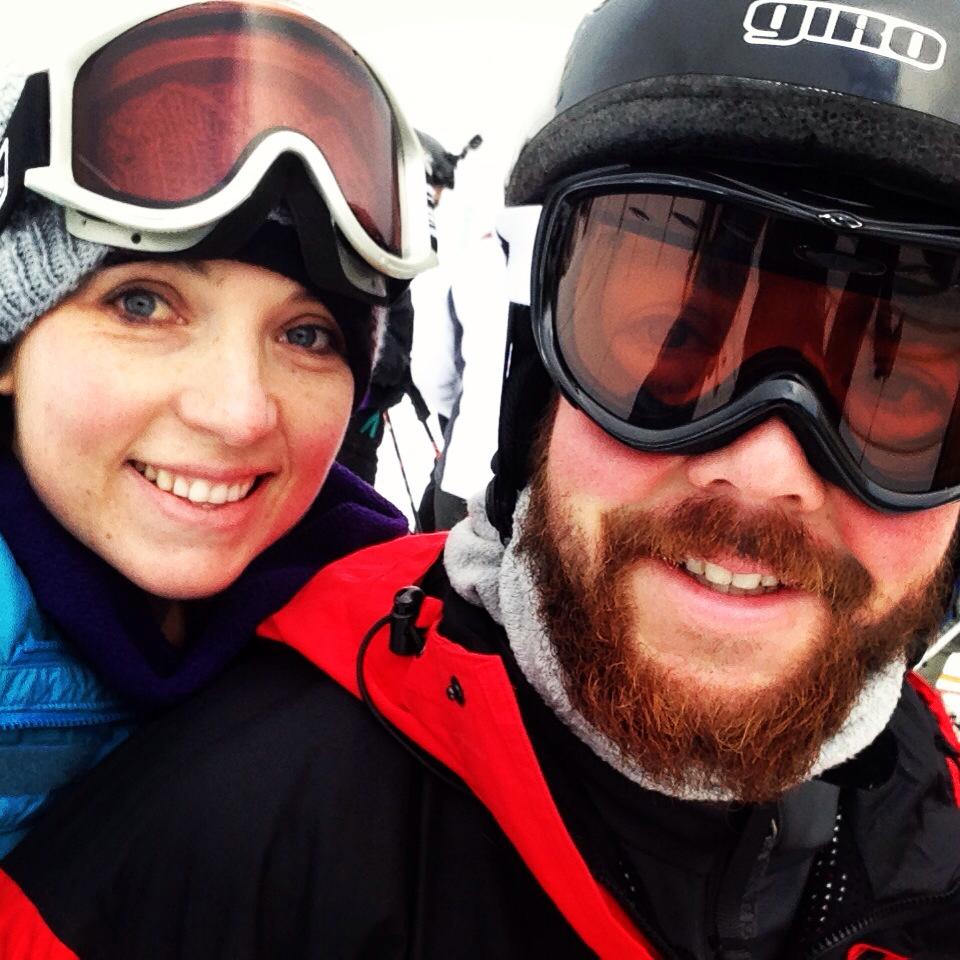
  • Sometimes there’s no one else around. Just you and something cool that you want to share or just remember. If the “thing” itself is photo worthy then maybe a selfie isn’t required. But sometimes you just want/need to capture the fact that YOU were there.
  • Little kids can’t always be trusted with cell phones or cameras.  I love taking pictures of my nieces and nephews but sometimes they also like ME to be in some of the pics too. And quite honestly sometimes I like being in the shot with them. If there’s no other adult around and you’re trying to capture the fun of the moment, a tripod/timer situation just isn’t going to cut it (kids’ attention spans just aren’t that long), which leaves you only one other option- a selfie.Niece selfie!
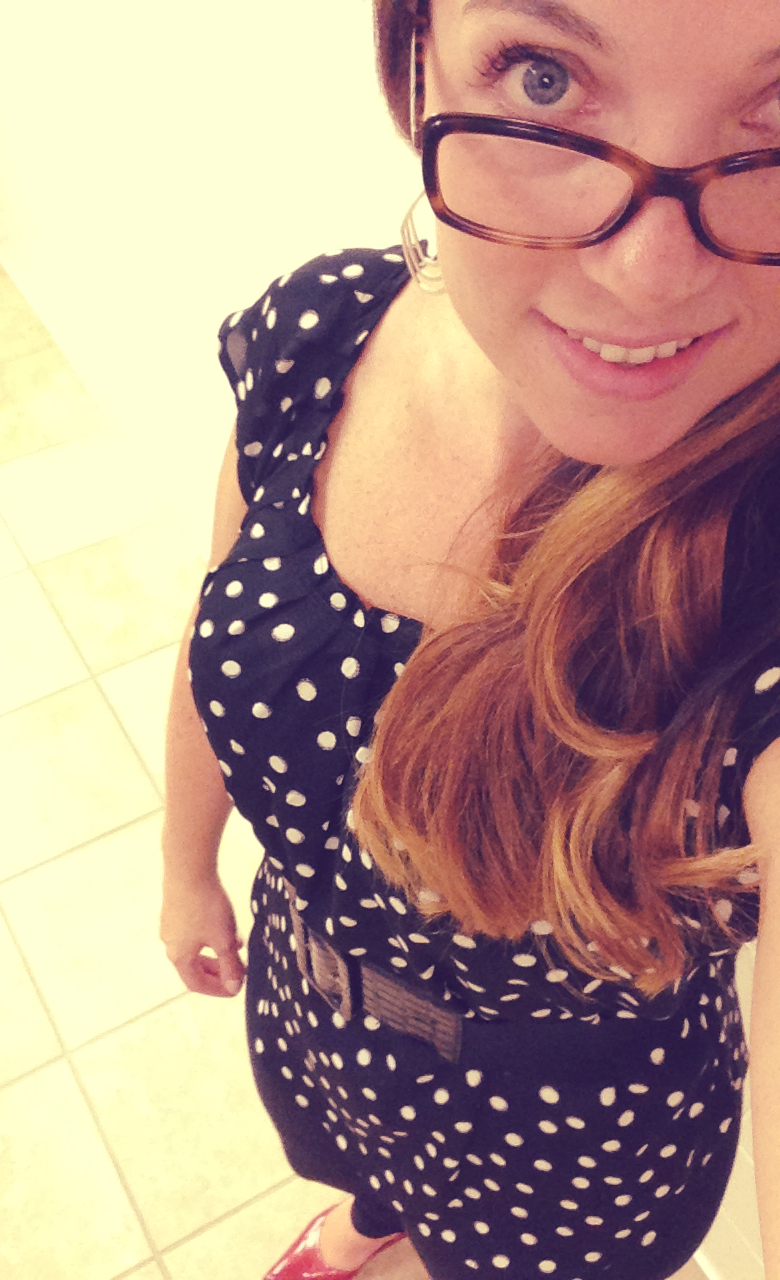
  • Sometimes you have something so exciting you just want to share it now- that new outfit you put together but you’re running late for work. Selfie!Fashion Selfie
  • Having YOU in your photo albums is important. There are far fewer photos of my mom as compared to my dad, my brother and me in our family albums. Why? Because Mom was often behind the camera. I wish I had more photos of her. If she took selfies with my brother and me as kids I can promise you I’d treasure those!My brother & me (skiing selfie)
  • Because you can choose how you look! If your significant other, friend or kid takes your photo it can and often will be done from a very unflattering angle. But if you control it, you can fiddle until you get it where you want it! Totally within your control!Outfit Selfie

Next Time on the Selfie Series

In the next installation, by popular demand, I’ll give you some of my favorite tips to take a better selfie. It’s nearly as easy to take a good selfie as it is a bad one– if you know what you’re doing!

FO in Focus: Rainton Hat

Today’s FO (Finished Object) is the Rainton Hat by Katya Frankel from Head to Toe: Kids’ Knit Accessories

Rainton Hat knit by Boston Jen of the Down Cellar Studio Podcast50mm lens at f2.0 1/40 ISO 320

My Project Notes:

  • Needles: US 6 (4mm)
  • Yarn: Cascade 220 Superwash in the Mystic Purple Colorway (used 36g)
  • Cast on: July 31, 2014
  • Cast off: August 2, 2014

Blocking |

I didn’t have time to block the entire hat for fear it wouldn’t dry in time. Instead I wet my fingers and used them to dampen the bind off edges of the hat. I then laid it out on a blocking mat and used T pins to pin down the brim. I staggered each layer so I could pin down each edge separately. I knew there would be some rolling because of the stockinette fabric, but I wanted it to look a little more polished. I’m happy with the result.

Photographing the FO

The Model | Photographing a baby hat without an actual child to model it is a tricky proposition. In order to see the real detail of the pattern the hat should be worn, filled out, not just lying flat. As you can see here, while its nice to capture the actual shape of the hat, its a bit lack luster.

Rainton Hat knit by BostonJen of the Down Cellar Studio Podcast

50mm lens at f2.0 1/40 ISO 320

Again, there are no children in our house, much less a newborn, though we do often have little ones coming to visit and so our supply of teddy bears, beanie babies and other toys runneth over.  With that in mind I got to searching. It was just this past Sunday morning (before the party where the hat would be gifted), and after a puzzled look from Dan about what on earth I was doing, and a quick explanation where he’d stored the “excess” of toys (down cellar AKA out of his way), I got to looking for a suitable model.

Did I mention we have a lot of toys for a house with no kids? Well, we do…. but it took awhile to find just the right one. An orange tiger? Not the right sized head and the color definitely clashed. Some already had hats on. Others had colors that were just jarring with this purple. But this teal teddy was just the man (woman? child?) for the job!

The Set-up | I like to use my armchair in the studio for photographing hand knits in certain situations. This seemed to be a perfect opportunity. Teddies are often placed in the crook of the chair (as are babies). I also like that while the chair is neutral and provides a background free of distraction, its also not pure white and has a little texture which adds visual interest.

Rainton Hat knit by BostonJen of the Down Cellar Studio Podcast


50mm lens at f2.0 1/30 ISO 320

The Angle | I like to take photographs of FOs (finished objects) from various angles because there are often little details you can capture from one direction that may not be visible from another. You may not think to point the camera down from above and shoot the top of a hat but there’s a lot of detail there that you may miss if you just take shots from head on.

Rainton Hat knit by BostonJen of the Down Cellar Studio Podcast


50mm lens at f2.0 1/30 ISO 320

The Settings | I’ve listed the camera settings under each image for your reference. I shot these using my Canon EF 50mm f/1.4 [Affiliate Link]. I love that it can get down to an aperture of 1.4 though that wasn’t necessary for this shot as I would lose too much detail.  With a 2.0 f-stop I was able to get some clear details on the top of the hat for example, and then the rest of the bear faded away to let the eye focus on the subject (the hat).

Tip | If you’d like to start playing around with manual settings on your camera, try the AV or Aperture Priority Mode. It’s hands-down my favorite of the modes on a dSLR that will help do some of the work and make some of the hard decisions for you. (I still use this more than Manual settings for everyday use)

  • If you want a shallow depth of field, like we have here with the top of the hat, set your           f-stop (your aperture) to the lowest number possible with your lens. The camera will automatically determine the right shutter speed to match.
  • However you’ll also want to set your ISO (lower if you have a lot of existing light or higher if you have less available light).
  • You can also set your White Balance if the light in the room is casting a specific color on your subject (using the Tungsten white balance setting, for example, can help correct light that’s overly yellow). Sometimes this isn’t necessary. In many situations the Auto White Balance setting will work just fine.

Photography: Engagement Photo Shoot Tips

The ring shot
Engagement photo shoots are such a happy time. Spending a few hours with a couple who are totally in love is a lot of fun.  Whether you’re doing a photo shoot for work or for pleasure, it is an afternoon well spent. 

But what do you need to do to get ready for the big day? Here are my tips from the engagement shoots I’ve done, using some photo examples from the more recent of the two.
 
Before the Shoot: 
Talk to the couple about what feel they’re looking for. Serious and formal or casual and carefree? Maybe they want to wear their favorite football jerseys… get some ideas from them and then scout out some locations.
 
In terms of choosing a location, I’d try for something that has multiple different types of locations within walking distance (or perhaps a short drive). I did one shoot near the ocean but there were different areas along the shore- grassy areas, the beach itself, a dock where boats came in and a huge stretch of rock. Then the second shoot I did, we started out in downtown Boston in the Beacon Hill neighborhood, which had great brick and cobblestone streets and old buildings… then we walked to the Boston Common which is a park setting. Its nice to have different settings without involving too much travel time in your day.


If you have time and if you’re new at this, I’d recommend going to that location and scouting out good shots in advance of the shoot- ideally with someone else who will let you take some test shots of them. I did this before one shoot and my mom graciously came along with me. It helped me find different shots and see what angles would work well. It also took a lot of pressure off me on the actual day because it felt like I’d had a dress rehearsal.
Find ideas you like online. Use a pinterest board. Save some images to your phone or a Word document. Whatever works best for you. Or simply make a list of poses you’d like to try. If you get nervous, pull out your list. Bam! Your answers are right there. If nothing else, it will get your creative brain in motion…
The Day of the Shoot:
Take advantage of natural light but aim for morning or a couple hours before sunset so you’re not competing with bright mid-day sun.
 
ISO: 400 f/1.4 1/1600 
Get shots from a ton of different angles. Shooting from above can be really flattering- no double chin look from that position 🙂 The lady you’re shooting will be happy about that.
ISO: 400 f3.5 1/100

Always aim to make the woman look beautiful. She’s likely the one who’s most interested in the whole photoshoot idea anyways…. that’s not to say to make the man look terrible, but you know what I mean. Aim to make her look slim and gorgeous and the couple will likely be satisfied with the photos. If her hair is out of place- fix it. Ask nicely before touching her if you’re not comfortable, but she can’t see herself and if you think she looks amiss, she probably will too when she gets the prints. Take a few seconds to make her look perfect.

ISO: 400 f/1.4 1/1225


Go for a wide-open aperture if you can.

ISO: 800 f1.4 1/2000

I almost exclusively use my 50mm 1.4 lens for photoshoots. I love it. I can get a nice crisp focus on faces and that really makes the shot. This is the only other lens I currently own for my DSLR and its a great investment. If you are looking for a lens, look into this one (and I’d strongly recommend saving the extra pennies to get the f1.4 over the cheaper 1.8).

Focus on each individual. Make them each the center of attention for a shot or two.
ISO: 400 f/1.4 1/200


ISO: 400 f4 1/125


Get some kissing shots. Its sweet. They’ll appreciate it when they’re 70, even if it feels a little cheesy now. Insider tip: Giving the soon-to-be-groom an alcoholic beverage or two in advance of the shoot is not a terrible idea. Just enough to loosen him up, mind you. You need a coherent subject.

ISO: 400 f4.5 1/160
 

Focus on the ring. Its special. Its new. Its something the bride will want to show off. Use the close-up on the ring to highlight special moments and small, more intimate touches between the couple. This is one of my favorite shots. Its not a traditional portrait- their heads are purposely cut off, but look how much emotion is still portrayed.

ISO: 400 f5 1/50

ISO: 800 f.14 1/1600


Don’t be afraid to get silly! Encourage them to tell each other jokes- or have some of your own at the ready. Go spur of the moment and try something you hadn’t planned. It can pay off big!

ISO: 400 f/1.4 1/1000
 
A little tickling can go a long way. The person being tickled may obviously laugh, but getting the natural reaction of the tickler is even more priceless!
ISO: 400 f2.5 1/320


Mix up the backgrounds. A hanging flower basket below a window adds a little femininity and warmth to the brick and mortar of the city.

ISO: 800 f2.2 1/1800


Go for the shots that may not be so obvious. We can’t see their faces, but we can feel the connection between these two. Its going to be a long {happy} road ahead.

ISO: 800 f1.4 1/2000


Don’t forget that your subjects will need some direction. I wanted to capture another side of their faces that I hadn’t yet seen. In this case, I asked them to look up at a lamp post. I think there was a bird nearby and I got talking about the bird… maybe we named the bird, or made up a silly story. When in doubt, give the direction and just keep talking. It will make even a fairly comfortable subject more at ease with a rather forced, unnatural situation- not to mention that the uneasy subject will be very grateful.

ISO: 800 f1.4 1/2000


ISO: 400 f8 1/20

Bring some props if you think it will help. A picnic blanket if you’re going to a park. Maybe some wine glasses if you want them to pretend to toast. A flower for the man to present to the woman… be creative. And again- make sure it fits what the couple is looking for.

I hope this is helpful for you budding photographers out there. My best advice it to practice, get familiar with your camera so that you can enjoy the experience. Do whatever you can to avoid being nervous and just have an enjoyable day!